
minimalインストールされたCentOS7環境に、RoundCube+php7+nginxでWebメールを構築する手順をまとめました。
前提条件
前提条件として「postfix」と「dovecot」の設定が完了しているものとします。
※postfixとdovecotのインストール方法はこちらのページにまとめてあります
インストールの流れ
システムの構築は以下のパッケージをインストール・設定していきます。
- php7
- php-fpm
- nginx
- RoundCube
- MariaDB
php7インストール
今回はphp7を使用して環境を構築していきます。
php7をインストールするためには、epelリポジトリとremiリポジトリが必要なので、それぞれのリポジトリを使用できるように設定を行っていきます。
epelリポジトリ追加
まずは「yum」を使ってepelリポジトリを追加していきます。
# yum -y install epel-release
epelリポジトリ設定
インストールするアプリがCentOS標準のリポジトリのアプリと混合しないように、「--enablerepo」で指定しなければ「epel」リポジトリを使用出来ない設定にしておきます。
# vi /etc/yum.repos.d/epel.repo
変更前
enabled=1
※全部で3か所あります
変更後
enabled=0
remiリポジトリ追加
次にremiリポジトリを追加していきます。
# rpm --import http://rpms.famillecollet.com/RPM-GPG-KEY-remi
# rpm -ivh http://rpms.famillecollet.com/enterprise/remi-release-7.rpm
remiリポジトリがインストールされると「/etc/yum.repos.d」ディレクトリに下記のファイルが作成されます。
- remi-php54.repo
- remi-php70.repo
- remi-php71.repo
- remi.repo
- remi-safe.repo
これらの設定ファイルは初期値が「enabled=0」となっているので、epelリポジトリ追加の際に行った設定ファイルの編集作業は必要ありません。
php7インストール
epelとremiリポジトリの追加が終わりましたら、php7のインストールを行っていきます。
その際にphp-fpmとRoundCubeインストールに必要なソフトもあわせてインストールを行っていきます。
# yum install --enablerepo=epel,remi-php70 php php-fpm php-mysql php-mbstring php-xml
php.ini設定
php7のインストールが完了しましたら、「RoundCube」用にタイムゾーン(Asia/Tokyo)の設定を行っていきます。
# cp -p /etc/php.ini /etc/php.ini_yyyymmdd
# vi /etc/php.ini
変更前
;date.timezone =
変更後
date.timezone = Asia/Tokyo
nginx インストール
今回はnginxをwebサーバとして使用するので、nginx開発元が提供しているリポジトリを使用してインストールを行っていきます。
nginxリポジトリ設定
nginxのリポジトリを使用するために「/etc/yum.repos.d/nginx.repo」ファイルを作成していきます。
※今回はstable版を使用していますが、mainline版を使用したい場合はそれ用のリポジトリファイルを作成してくだしさい。詳しくはnginxリポジトリの追加方法を参照願います。
# vi /etc/yum.repos.d/nginx.repo
設定内容
[nginx]
name=nginx repo
baseurl=http://nginx.org/packages/centos/7/$basearch/
gpgcheck=0
enabled=0
nginxインストール
nginxリポジトリの追加が終わりましたら「yum」コマンドでnginxをインストールしていきます。
# yum --enablerepo=nginx install nginx
「RoundCube」用の設定は、「RoundCube」のインストールと「MariaDB」のインストールが完了後に行います。
自動起動設定
設定ファイルが作成出来たら、nginxを起動して合わせて自動起動の設定も行っておきます。
# systemctl start nginx
# systemctl enable nginx
php-fpm設定
php-fpmをnginxで使用するための設定を「/etc/php-fpm.d/www.conf」に行っていきます。
# cd /etc/php-fpm.d
# cp -p www.conf www.conf_yyyymmdd
# vi www.conf
変更前
user = apache
group = apache
変更後
user = nginx
group = nginx
php-fpm自動起動設定
設定ファイルの編集が終わりましたらphp-fpmを起動し、合わせて自動起動の設定も行っておきます。
# systemctl start php-fpm
# systemctl enable php-fpm
RoundCube Webメール
Webメールシステムである「RoundCube」をインストールおよび設定を行っていきます。
ダウンロード
「RoundCube」は「yum」ではインストールできないため、公式サイトよりソースをダウンロードしてくる必要があります。
ダウンロードサイトhttps://roundcube.net/download/
# cd /root
# wget https://github.com/roundcube/roundcubemail/releases/download/1.2.5/roundcubemail-1.2.5-complete.tar.gz
インストール
インストール自体はとても簡単で、ダウンロードしてきたソースを解凍して適当な場所に配置するといった形になります。
今回はnginxの設定で指定した「/usr/share/nginx/roundcubemail」に回答したデータを格納していきます。
# tar xzfv roundcubemail-1.2.5-complete.tar.gz -C /usr/share/nginx/
# cd /usr/share/nginx
# mv roundcubemail-1.2.5 roundcubemail
解凍したデータの所有者を「nginx」に設定しておきましょう。
# chown -R nginx:nginx /usr/share/nginx/roundcubemail
設定
「roundcube」を動作させるための設定を行っていきます。
設定ファイルのひな型が、解凍したデータの「config」ディレクトリ内に「defaults.inc.php」というファイル名で用意されているので、それをコピーして「config.inc.php」というファイルを作成し、編集作業を行っていきます。
# cd roundcubemail/config
# cp -p defaults.inc.php config.inc.php
# vi config.inc.php
設定内容
最低限設定する項目は下記の内容となります。
- データベース設定
- smtpサーバ設定
- 言語設定
- メールドメインの設定
データベース設定
まず、「roundcube」で使用するDBの設定を決めておく必要があり、その設定どおりに後ほどMariaDBの設定を行っていきます。
今回は下記の設定を使用していきます。
| 設定項目 | 内容 |
|---|---|
| データベース名 | roundcubemail |
| データベース管理ユーザ | roundcube |
| 管理ユーザパスワード | roundpass |
「roundcube」で使用するデータベースの設定を「mysql://データべース管理ユーザ:パスワード@localhost/データベース名」といった形式で設定します。
変更前 $config['db_dsnw'] = 'mysql://roundcube:@localhost/roundcubemail';
変更後 $config['db_dsnw'] = 'mysql://roundcube:roundpass@localhost/roundcubemail';
smtpサーバ設定
メール送信に使用するsmtpサーバを指定します。
今回は自サーバのpostfixをsmtpサーバとして使用するので「127.0.0.1」とします。
変更前 $config['smtp_server'] = '';
変更後 $config['smtp_server'] = '127.0.0.1';
言語設定
使用する言語を設定します。
変更前 $config['language'] = null;
変更後 $config['language'] = ja_JP;
メールドメイン設定
使用するメールのドメインを設定します。
ここの設定はメール送信時にメールアドレスとして使用されるドメイン名を指定する必要があります。今回は「server-memo.net」と指定します。
変更前 $config['mail_domain'] = '';
変更後 $config['mail_domain'] = 'server-memo.net';
MariaDB
「roundcube」で使用するデータベースサーバ「MariaDB」のインストールと設定を行っていきます。
MariaDBインストール
「yum」を使ってインストールを行っていきます。
# yum install mariadb mariadb-server
MariaDB起動・自動起動設定
インストールが終わったら、早速MariaDBの起動と自動起動設定を行います。
# systemctl start mariadb
# systemctl enable mariadb
MariaDB初期設定
MariaDBを使用し始める前に「mysql_secure_installation」を実行して初期設定を行っていきます。
※初期設定の詳しい説明はこちらのページを参照願います
# mysql_secure_installation

NOTE: RUNNING ALL PARTS OF THIS SCRIPT IS RECOMMENDED FOR ALL MariaDB
      SERVERS IN PRODUCTION USE!  PLEASE READ EACH STEP CAREFULLY!

In order to log into MariaDB to secure it, we'll need the current
password for the root user.  If you've just installed MariaDB, and
you haven't set the root password yet, the password will be blank,
so you should just press enter here.

Enter current password for root (enter for none):
OK, successfully used password, moving on...

Setting the root password ensures that nobody can log into the MariaDB
root user without the proper authorisation.

Set root password? [Y/n] <--「y」または「Enter」キーを押下
New password:       <--「MariaDB」のrootパスワードを設定
Re-enter new password:  <--パスワードの再入力
Password updated successfully!
Reloading privilege tables..
 ... Success!


By default, a MariaDB installation has an anonymous user, allowing anyone
to log into MariaDB without having to have a user account created for
them.  This is intended only for testing, and to make the installation
go a bit smoother.  You should remove them before moving into a
production environment.

Remove anonymous users? [Y/n] <--「y」または「Enter」キーを押下
 ... Success!

Normally, root should only be allowed to connect from 'localhost'.  This
ensures that someone cannot guess at the root password from the network.

Disallow root login remotely? [Y/n] <--「y」または「Enter」キーを押下
 ... Success!

By default, MariaDB comes with a database named 'test' that anyone can
access.  This is also intended only for testing, and should be removed
before moving into a production environment.

Remove test database and access to it? [Y/n] <--「y」または「Enter」キーを押下
 - Dropping test database...
 ... Success!
 - Removing privileges on test database...
 ... Success!

Reloading the privilege tables will ensure that all changes made so far
will take effect immediately.

Reload privilege tables now? [Y/n] <--「y」または「Enter」キーを押下
 ... Success!

Cleaning up...

All done!  If you've completed all of the above steps, your MariaDB
installation should now be secure.

Thanks for using MariaDB!
roundcube用設定
初期設定が完了しましたら「roundcube」用の設定を行っていきますが、設定は「roundcube」設定の際に「config.inc.php」に設定をした内容に合わせて、データベースの設定作業を行っていきます。
まずは、MariaDBのrootユーザで接続します。(パスワードは初期設定設定したものを入力してください)
# mysql -u root -p
Enter password:
データベース作成
「roundcube」用のデータベースを作成します。
今回はデータベース名を「config.inc.php」に設定したとおり「roundcubemail」として作成していきます。
MariaDB [(none)]> CREATE DATABASE roundcubemail;
Query OK, 1 row affected (0.00 sec)
管理用ユーザ作成
作成したデータベース「roundcubemail」の管理用ユーザを下記内容で作成します。
こちらも「config.inc.php」にした設定とおり、管理ユーザとパスワードを下記内容で設定を行っていきます。
- 管理ユーザ roundcube
- パスワード roundpass
> GRANT ALL PRIVILEGES ON roundcubemail.* TO roundcube@localhost  IDENTIFIED BY 'roundpass';
Query OK, 0 rows affected (0.00 sec)
設定反映
「FLUSH PRIVILEGES」で、作成したユーザの情報を反映させます。
MariaDB [(none)]> FLUSH PRIVILEGES;
Query OK, 0 rows affected (0.00 sec)
MariaDB [(none)]> exit
Bye
データベース初期化
「roundcube」をインストールした際に作成されたファイルを使用して、作成したデータベースの初期化を行います
# mysql -u root -p roundcubemail < /usr/share/nginx/roundcubemail/SQL/mysql.initial.sql
Enter password:
nginx設定
roundcube用設定
「roundcube」と「MariaDB」のインストールおよび設定が完了しましたら、「nginx」に「roundcube」(webメールシステム)用の設定ファイルを作成していきます。
# vi /etc/nginx/conf.d/roundcube.conf
今回の設定内容は下記の通りとなっています。
- サーバ名 conoha.server-memo.net
- roundcubeインストール場所 /usr/share/nginx/roundcubemail
server {
    listen       80;
    server_name  conoha.server-memo.net;
    root         /usr/share/nginx/roundcubemail;

    location / {
        index index.php index.html index.htm;
    }

    location ~ (/(config/|temp/|logs/|README|INSTALL|UPGRADING|LICENSE|SQL|bin/|CHANGELOG)|/\.) {
        deny all;
    }

  location ~ \.php$ {
    fastcgi_pass 127.0.0.1:9000;
    fastcgi_param SCRIPT_FILENAME $document_root$fastcgi_script_name;
    fastcgi_param PATH_INFO $fastcgi_script_name;
    include fastcgi_params;
  }
}
設定反映
「nginx」を再起動させて設定をを反映させます。
# systemctl restart nginx
動作確認
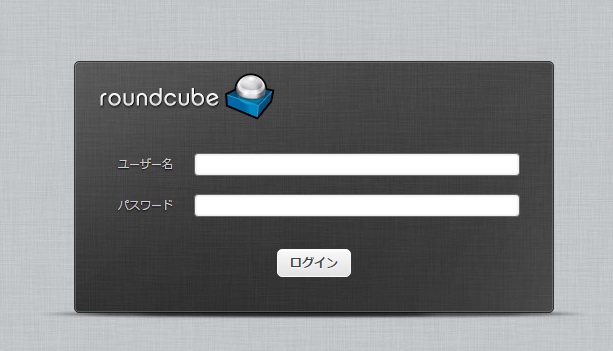
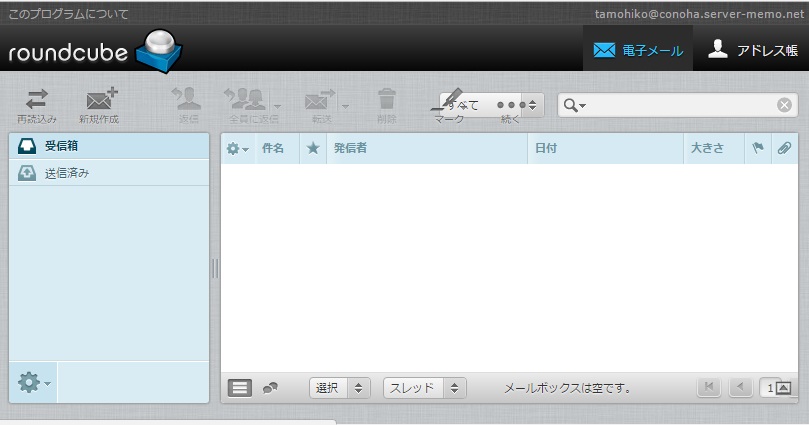
ここまでの設定が完了しましたら、一度実際にwebブラウザから「http://サーバ名」に接続して、「roundcube」の動作確認を行ってみましょう。
ログイン画面
ログイン後の画面
httpsで暗号化
webブラウザでの動作確認を行い動作に問題がないことが確認できたら、次はセキュリティ的に通信経路を「https」で暗号化しておいたほうが良いでしょう。
今回は「Let's Encrypt」で無料のSSL証明書を取得して、webサーバの「https」対応を行っていきます。
※CentOS7での「Let's Encrypt」導入手順や自動更新方法はこちらのページで詳しく説明していますので、参考にしてください。
certbotインストール
「Let's Encrypt」からSSL証明書を取得するために、クライアントである「certbot」をインストールします。
# yum install --enablerepo=epel certbot
SSL証明書の取得
今回は「--standalone」オプションを使用して証明書を取得していきます。
書式は下記の通りとなります。
certbot certonly --standalone -d サーバ名 -m 連絡先メールアドレス --agree-tos
「--standalone」オプションを使用する場合は、webサーバが起動しているとエラーになってしまうため、一度webサーバを停止させてSSL証明書を取得する必要があります。
今回「roundcube」を導入するサーバは「conoha.server-memo.net」なので、そのようにサーバ名を指定しています。
SSL証明書の取得が完了しましたらwebサーバを起動しておくことを忘れないようにしてください。
# systemctl stop nginx
# certbot certonly --standalone -d conoha.server-memo.net -m tamohiko@server-memo.net --agree-tos
# systemctl start nginx
※SSL証明書の自動更新設定も忘れずに行っておきましょう。
nginx設定ファイル作成
ssl証明書を取得したので、SSL対応させるための設定ファイルを作成していきます。
今回は「http」接続を「https」接続に変更する設定も併せて行っています。
# cd /etc/nginx/conf.d
# cp -p roundcube.conf roundcuve.conf_yyyymmdd
# vi roundcube.conf
設定内容
とりあえず「roundcube」に「https」接続させるための設定となります。そのほかに必要な設定があれば適宜追加してください。
下記項目は環境にあわせて適宜書き換えて下さい。
- server_name サーバ名
- ssl_certificate SSL証明書「fullchain.pem」のフルパス
- ssl_certificate_key 秘密鍵「privkey.pem」のフルパス
server {
    listen       80;
    server_name  conoha.server-memo.net;
    return 301 https://$host$request_uri;
}

server {
    listen       443 ssl;
    server_name  conoha.server-memo.net;
    root         /usr/share/nginx/roundcubemail;

    ssl_certificate /etc/letsencrypt/live/conoha.server-memo.net/fullchain.pem;
    ssl_certificate_key /etc/letsencrypt/live/conoha.server-memo.net/privkey.pem;
    ssl_protocols TLSv1 TLSv1.1 TLSv1.2;
    ssl_ciphers 'ECDHE-RSA-AES128-GCM-SHA256:ECDHE-ECDSA-AES128-GCM-SHA256:ECDHE-RSA-AES256-GCM-SHA384:ECDHE-ECDSA-AES256-GCM-SHA384:DHE-RSA-AES128-GCM-SHA256:DHE-DSS-AES128-GCM-SHA256:kEDH+AESGCM:ECDHE-RSA-AES128-SHA256:ECDHE-ECDSA-AES128-SHA256:ECDHE-RSA-AES128-SHA:ECDHE-ECDSA-AES128-SHA:ECDHE-RSA-AES256-SHA384:ECDHE-ECDSA-AES256-SHA384:ECDHE-RSA-AES256-SHA:ECDHE-ECDSA-AES256-SHA:DHE-RSA-AES128-SHA256:DHE-RSA-AES128-SHA:DHE-DSS-AES128-SHA256:DHE-RSA-AES256-SHA256:DHE-DSS-AES256-SHA:DHE-RSA-AES256-SHA:ECDHE-RSA-DES-CBC3-SHA:ECDHE-ECDSA-DES-CBC3-SHA:AES128-GCM-SHA256:AES256-GCM-SHA384:AES128-SHA256:AES256-SHA256:AES128-SHA:AES256-SHA:AES:CAMELLIA:DES-CBC3-SHA:!aNULL:!eNULL:!EXPORT:!DES:!RC4:!MD5:!PSK:!aECDH:!EDH-DSS-DES-CBC3-SHA:!EDH-RSA-DES-CBC3-SHA:!KRB5-DES-CBC3-SHA';
    ssl_prefer_server_ciphers on;

    location / {
        index index.php index.html index.htm;

    }

    location ~ (/(config/|temp/|logs/|README|INSTALL|UPGRADING|LICENSE|SQL|bin/|CHANGELOG)|/\.) {
        deny all;
    }

  location ~ \.php$ {
    fastcgi_pass 127.0.0.1:9000;
    fastcgi_param SCRIPT_FILENAME $document_root$fastcgi_script_name;
    fastcgi_param PATH_INFO $fastcgi_script_name;
    include fastcgi_params;
  }
}
設定反映
nginxを再起動させて設定を反映させます。
# systemctl restart nginx
動作確認
最後にwebブラウザで「https://サーバ名」に接続すると「roundcube」のログイン画面が表示されるので、ログインを行ってメール関連の動作確認を行ってください。
コメント