
「CentOS7」にチャットサービスである「Slack」とよく似た機能をもったオープンソースの「Mattermost」をインストール手順です。
予算やその他もろもろの事情で「Slack」が導入できないが、チャットソフトを使用したい場合等に使えるかもです。
ポート開放
「Mattermost」はTCPの8065番ポートを使用するので「firewalld」で該当ポートの開放を行いまう。
# firewall-cmd --permanent --add-port=8065/tcp
# firewall-cmd --reload
mattermost用ユーザの作成
「Mattermost」を動作させるためのユーザを「useradd ユーザ名」で作成して、「passwd ユーザ名」で作成したユーザにパスワードを設定します。
今回は「mattermost」というユーザを作成していきます。
# useradd mattermost
# passwd mattermost
ユーザー mattermost のパスワードを変更。
新しいパスワード: (設定するパスワードを入力)
新しいパスワードを再入力してください: (設定するパスワードを入力)
passwd: すべての認証トークンが正しく更新できました。
MariaDB
データベースは「MariaDB」を使用することにします。
インストールはMariaDBの公式サイトにあるリポジトリを使用し「yum」コマンドを使って行っていきます。
# curl -sS https://downloads.mariadb.com/MariaDB/mariadb_repo_setup | bash
# yum install MariaDB-server MariaDB-client
リポジトリの作成はMariaDB公式サイトの下記ページで紹介されている方法使用して作成しています。
https://mariadb.com/kb/en/library/mariadb-package-repository-setup-and-usage/
インストールが終わったら「MariaDB」の起動と自動起動設定を行っておきます。
# systemctl start mariadb
# systemctl enable mariadb
初期設定
「mysql_secure_installation」コマンドを使用して「MariaDB」の初期設定を行っていきます。
基本「Enter」キーを入力するだけで良いですが、「New password: 」「Re-enter new password:」でMariaDBのrootユーザパスワード設定部分では設定したいパスワードの入力をお願いします。
# mysql_secure_installation
NOTE: RUNNING ALL PARTS OF THIS SCRIPT IS RECOMMENDED FOR ALL MariaDB
      SERVERS IN PRODUCTION USE!  PLEASE READ EACH STEP CAREFULLY!

In order to log into MariaDB to secure it, we'll need the current
password for the root user. If you've just installed MariaDB, and
haven't set the root password yet, you should just press enter here.

Enter current password for root (enter for none):
OK, successfully used password, moving on...

Setting the root password or using the unix_socket ensures that nobody
can log into the MariaDB root user without the proper authorisation.

You already have your root account protected, so you can safely answer 'n'.

Switch to unix_socket authentication [Y/n]
Enabled successfully!
Reloading privilege tables..
 ... Success!


You already have your root account protected, so you can safely answer 'n'.

Change the root password? [Y/n]
New password:     (パスワード入力)
Re-enter new password:  (パスワード入力)
Password updated successfully!
Reloading privilege tables..
 ... Success!


By default, a MariaDB installation has an anonymous user, allowing anyone
to log into MariaDB without having to have a user account created for
them.  This is intended only for testing, and to make the installation
go a bit smoother.  You should remove them before moving into a
production environment.

Remove anonymous users? [Y/n]
 ... Success!

Normally, root should only be allowed to connect from 'localhost'.  This
ensures that someone cannot guess at the root password from the network.

Disallow root login remotely? [Y/n]
 ... Success!

By default, MariaDB comes with a database named 'test' that anyone can
access.  This is also intended only for testing, and should be removed
before moving into a production environment.

Remove test database and access to it? [Y/n]
 - Dropping test database...
 ... Success!
 - Removing privileges on test database...
 ... Success!

Reloading the privilege tables will ensure that all changes made so far
will take effect immediately.

Reload privilege tables now? [Y/n]
 ... Success!

Cleaning up...

All done!  If you've completed all of the above steps, your MariaDB
installation should now be secure.

Thanks for using MariaDB!
データベース作成
「Mattermost」で使用するためのデータベースとデータベース管理者ユーザを下記の内容で作成します。
- データベース: mattermost
- 管理ユーザ: mmuser
- パスワード: mmuser-password
「データベース」「ユーザ」「パスワード」については、特に決まりはないので好きなものを設定して問題ありませんが、変更して作成した場合は以後の手順の内容を読み替えて作業を行ってください。
# mysql -u root
MariaDB [(none)]> CREATE DATABASE mattermost;
MariaDB [(none)]> CREATE USER 'mmuser'@'localhost' IDENTIFIED BY 'mmuser-password';
MariaDB [(none)]> GRANT ALL PRIVILEGES ON mattermost.* TO 'mmuser'@'localhost';
MariaDB [(none)]> QUIT
Mattermost
「Mattermost」のインストール作業を行っていきます。
下記のURLにwebブラウザでアクセスするとダウンロード用の画面が表示されます。
https://mattermost.com/download/
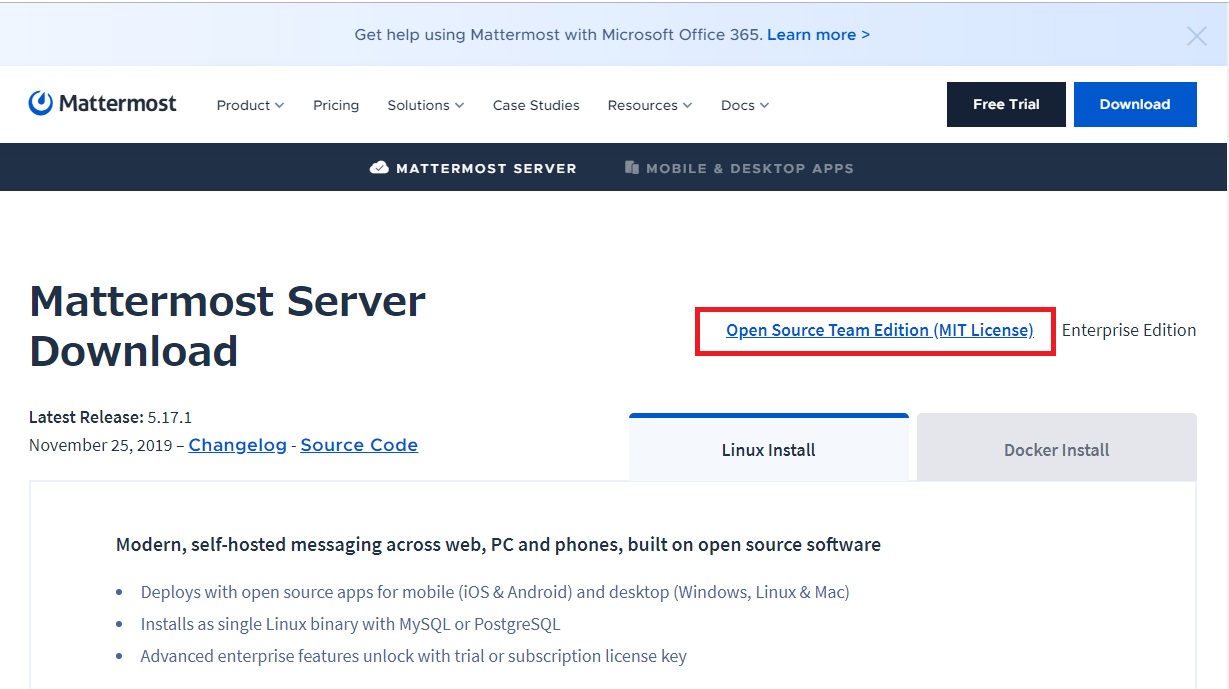
「Open Source Team Edition (MIT License)」をクリックするとダウンロード用のURLが表示されます。
「Linux Install」タブが選択されていることを確認してください。
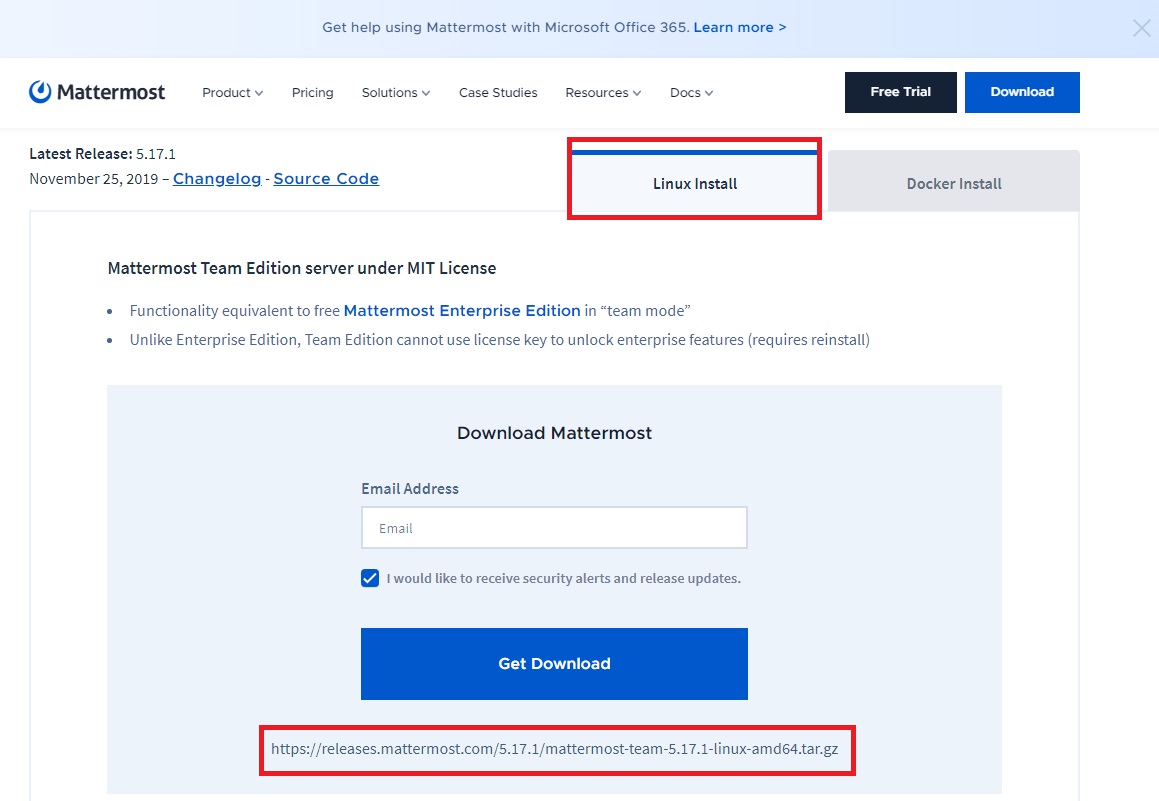
ダウンロード用のURLが表示されるので、それをコピーして「curl」でダウンロードしその後に解凍を行います。
解凍すると「mattermost」というディレクトリが出てくるので、「/opt」ディレクトリの下に「mv」コマンドを使って移動します。
今回は「/opt」ディレクトリの下に「mattermost」を設置しましたが、設置場所に決まりは無いのでお好きな場所でかまいません。
ただし設置場所を変更した場合は、以後の手順の内容を適宜読み替えて作業を行ってください。
# curl -LO https://releases.mattermost.com/5.17.1/mattermost-team-5.17.1-linux-amd64.tar.gz
# tar xzfv mattermost-team-5.17.1-linux-amd64.tar.gz
# mv mattermost /opt
データ用のフォルダを作成します。
# mkdir /opt/mattermost/data
移動させた「mattermost」ディレクトリの所有者とグループを「mattermost」に設定し、グループに書き込み権限を追加します。
# chown -R mattermost:mattermost /opt/mattermost
# chmod -R g+w /opt/mattermost
データベース接続設定
「/opt/mattermost/config/config.json」ファイルを編集して、データベースへの接続に関する設定を行います。
# cp -p /opt/mattermost/config/config.json /opt/mattermost/config/config.json_org
# vi /opt/mattermost/config/config.json
編集内容
使用するデータベースソフトの設定
「SqlSettings」項目の「DriverName」が「mysql」であることを確認します。
"DriverName": "mysql",
データベースへの接続設定
「DataSource」の「mmuser:mostest@tcp(localhost:3306)/mattermost_test」部分で、「mattermost」用のデータベースに接続するための設定を行います。
設定する箇所と内容は下記の通りとなります。
- mmuser:mostest データベース管理者ユーザ名:パスワード
- mattermost_test データベース名
本手順では、「Mattermost」用のデータベースを「mattermost」という名前で作成していて、作成したデータベースの管理ユーザとして「mmuser」を作成して、パスワードを「mmuser-password」と設定しているので下記のように設定を行います。
"DataSource": "mmuser:mmuser-password@tcp(localhost:3306)/mattermost?charset=utf8mb4,utf8\u0026readTimeout=30s\u0026writeTimeout=30s",
起動確認
「Mattermost」が問題なく起動できるかの動作確認を行っていきます。
Mattermost 起動
「Mattermost」は、動作用のユーザで「/opt/mattermost/bin/mattermost」を実行することで起動させることができます。
# su - mattermost
$ /opt/mattermost/bin/mattermost
{"level":"info","ts":1576481082.8477635,"caller":"utils/i18n.go:83","msg":"Loaded system translations","for locale":"en","from locale":"/opt/mattermost/i18n/en.json"}
{"level":"info","ts":1576481082.8479252,"caller":"app/server_app_adapters.go:59","msg":"Server is initializing..."}
{"level":"info","ts":1576481082.8598568,"caller":"sqlstore/supplier.go:222","msg":"Pinging SQL","database":"master"}
{"level":"info","ts":1576481082.9971683,"caller":"sqlstore/upgrade.go:110","msg":"The database schema has been set to version 5.17.0"}
{"level":"error","ts":1576481083.2771857,"caller":"app/server_app_adapters.go:126","msg":"SiteURL must be set. Some features will operate incorrectly if the SiteURL is not set. See documentation for details: http://about.mattermost.com/default-site-url"}
{"level":"info","ts":1576481083.2780147,"caller":"app/migrations.go:26","msg":"Migrating roles to database."}
{"level":"info","ts":1576481083.2950435,"caller":"sqlstore/post_store.go:1356","msg":"Post.Message has size restrictions","max_characters":16383,"max_bytes":65535}
{"level":"info","ts":1576481083.296779,"caller":"app/migrations.go:102","msg":"Migrating emojis config to database."}
{"level":"info","ts":1576481083.369336,"caller":"mlog/log.go:166","msg":"Starting up plugins"}
{"level":"error","ts":1576481083.3694086,"caller":"app/plugin.go:145","msg":"Failed to start up plugins","error":"mkdir ./client/plugins: no such file or directory"}
{"level":"info","ts":1576481083.3694377,"caller":"app/server.go:216","msg":"Current version is 5.17.0 (5.17.1/Mon Nov 25 17:40:04 UTC 2019/c81e4f87c20a717b1dc52b2b77780fa789e19148/none)"}
{"level":"info","ts":1576481083.369449,"caller":"app/server.go:217","msg":"Enterprise Enabled: false"}
{"level":"info","ts":1576481083.369464,"caller":"app/server.go:219","msg":"Current working directory is /home/mattermost"}
{"level":"info","ts":1576481083.3694718,"caller":"app/server.go:220","msg":"Loaded config","source":"file:///opt/mattermost/config/config.json"}
{"level":"info","ts":1576481083.3766055,"caller":"mlog/log.go:166","msg":"Starting up plugins"}
{"level":"error","ts":1576481083.3766346,"caller":"app/plugin.go:145","msg":"Failed to start up plugins","error":"mkdir ./client/plugins: no such file or directory"}
{"level":"info","ts":1576481083.4250002,"caller":"mlog/log.go:166","msg":"Starting up plugins"}
{"level":"error","ts":1576481083.4250503,"caller":"app/plugin.go:145","msg":"Failed to start up plugins","error":"mkdir ./client/plugins: no such file or directory"}
{"level":"info","ts":1576481083.425937,"caller":"jobs/workers.go:68","msg":"Starting workers"}
{"level":"info","ts":1576481083.4260323,"caller":"app/server.go:423","msg":"Starting Server..."}
{"level":"info","ts":1576481083.4261756,"caller":"app/server.go:489","msg":"Server is listening on [::]:8065"}
{"level":"info","ts":1576481083.4320018,"caller":"app/web_hub.go:75","msg":"Starting 2 websocket hubs"}
{"level":"info","ts":1576481083.4351635,"caller":"jobs/schedulers.go:72","msg":"Starting schedulers."}
無事起動できていれば「Starting Server」「Server is listening on [::]:8065"」といったメッセージが表示されているはずです。
{"level":"info","ts":1576481083.4260323,"caller":"app/server.go:423","msg":"Starting Server..."}
{"level":"info","ts":1576481083.4261756,"caller":"app/server.go:489","msg":"Server is listening on [::]:8065"}
初期設定
「Mattermost」の起動が無事確認できましたら、webブラウザで「http://サーバのIPアドレス:8065」アクセスして初期設定を行っていきます。
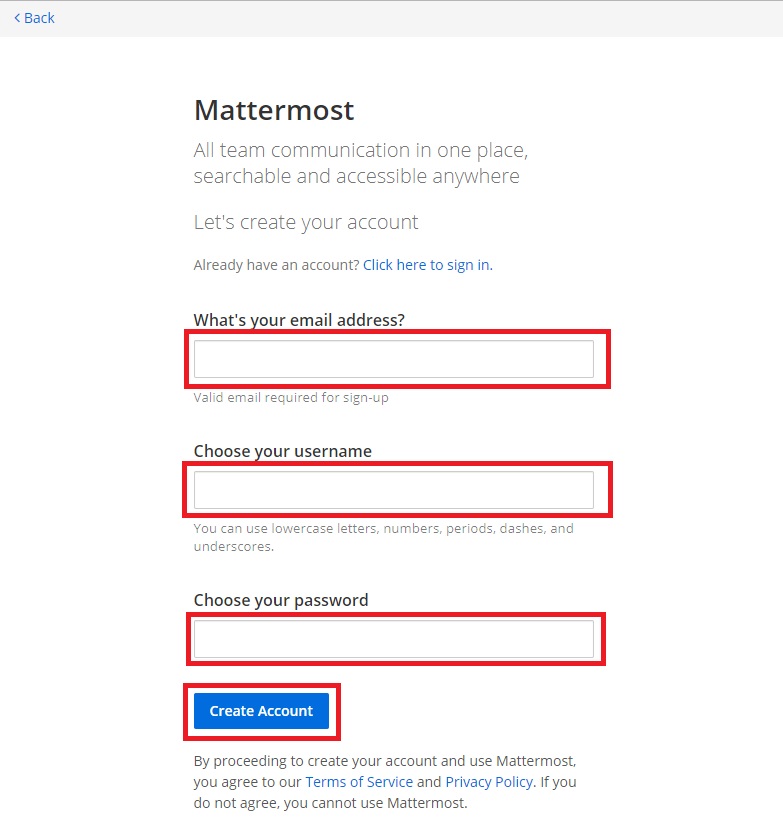
管理者アカウント作成
アカウント作成画面が表示されるので、「メールアドレス」「ユーザ名」「パスワード」を設定してから、「Create Account」ボタンを押下してアカウントを作成します。
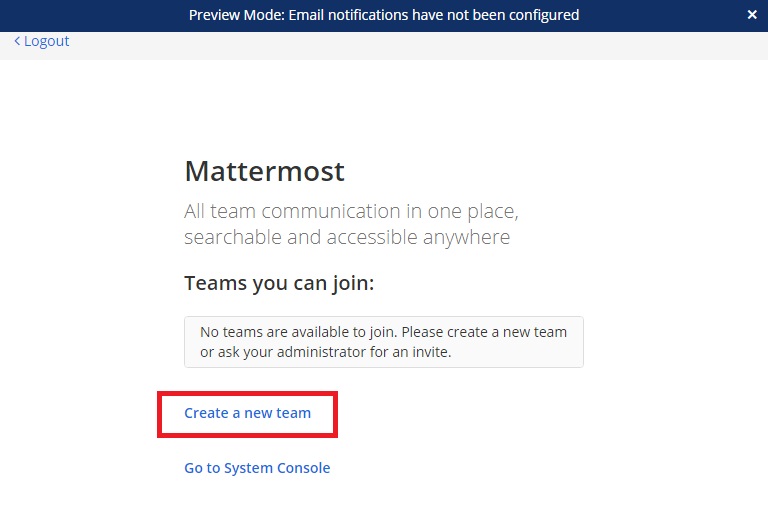
チーム作成
ログイン後の画面に表示されている「Create a new team」をクリックします。
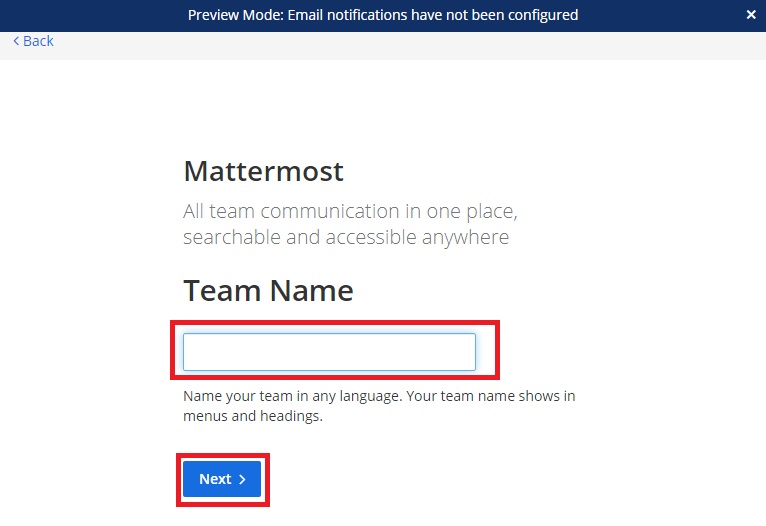
「Team Name」の部分にチーム名を設定して、「Next」ボタンを押下します。
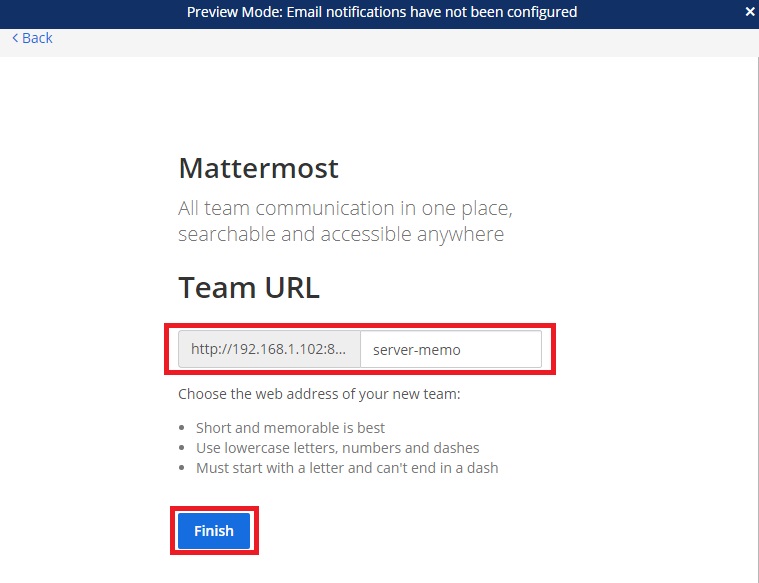
作成したチームのURLが表示されるので、確認して「Finish」ボタンを押下します。
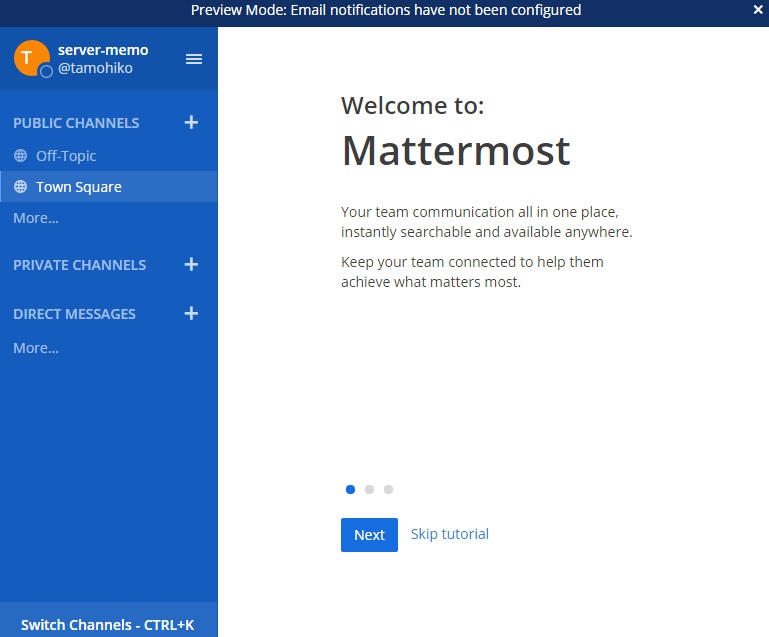
作成したチームの管理画面が表示されます。
日本語設定
チームが作成されるとチーム用の画面が表示されるので、画面左側メニューのユーザ名横のアイコンをクリックしてメインメニューを表示させます。
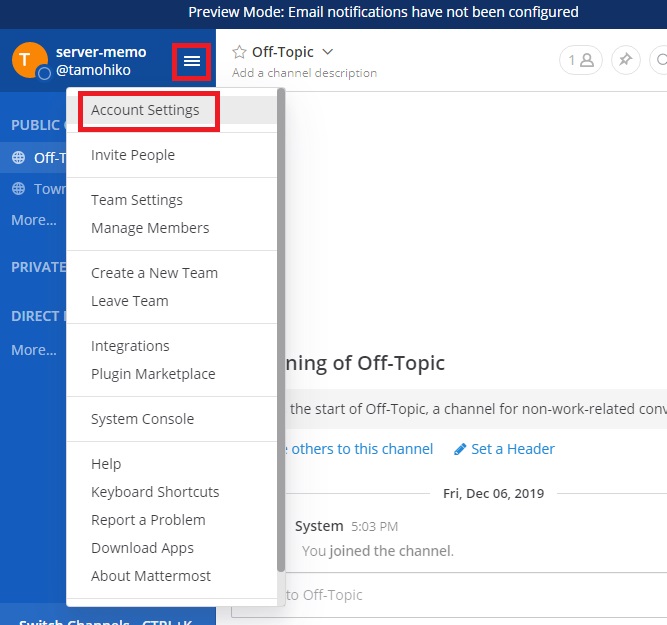
表示されたメニューから「Account Settings」をクリックします。
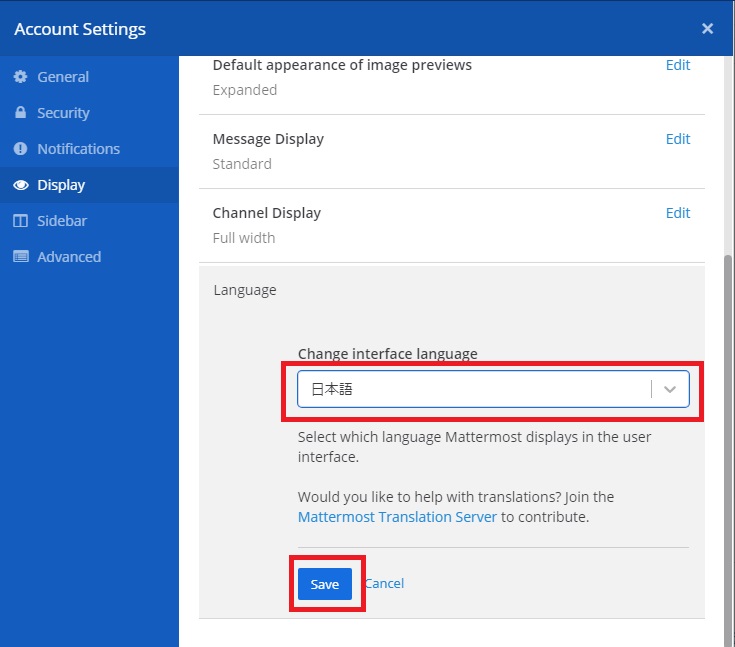
左側のメニューで「Display」をクリックし、表示される画面の「Language」項目で「Edit」をクリックします。

「Change interface language」の部分で「日本語」を選択した後に「Save」ボタンを押下します。
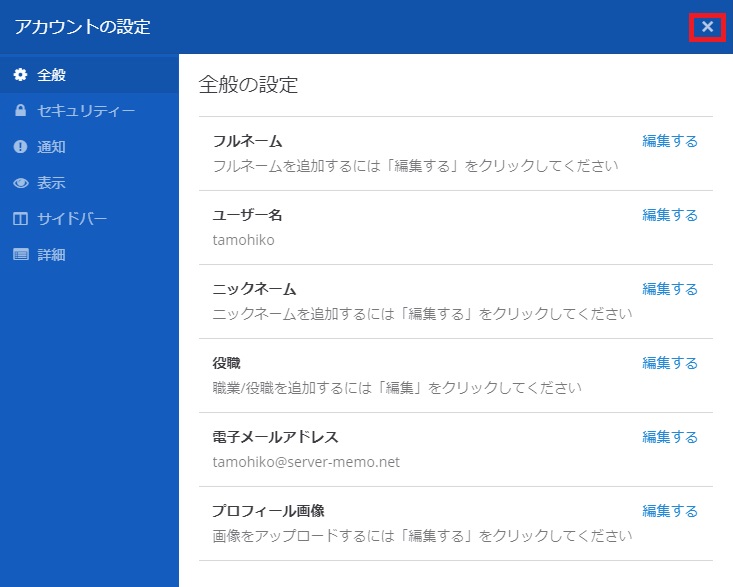
メニューやメッセージが日本語に変更されたことを確認して、画面右上にある「×」をクリックして画面を閉じてください。
Mattermost 停止
「Mattermost」の初期設定として「管理ユーザ作成」「チーム作成」が完了しましたら、一度「Mattermost」を停止させます。
「Mattermost」を停止させる場合は「Ctrl」+「c」キーを押下すると停止させることができます。
停止すると下記のように「Server stopped」とログが表示されます。
{"level":"info","ts":1576481276.6101897,"caller":"app/server.go:367","msg":"Server stopped"}
自動起動設定
「/etc/systemd/system/mattermost.service」ファイルを作成して、「Mattermost」の自動起動設定を行っていきます。
$ su -
# vi /etc/systemd/system/mattermost.service
設定内容は下記の通りとなります。
インストールディレクトリやユーザの名前を変更している場合は、適宜内容を読み替えてファイルを作成してください。
[Unit]
Description=Mattermost
After=syslog.target network.target mariadb.service

[Service]
Type=notify
WorkingDirectory=/opt/mattermost
User=mattermost
ExecStart=/opt/mattermost/bin/mattermost
PIDFile=/var/spool/mattermost/pid/master.pid
TimeoutStartSec=3600
LimitNOFILE=49152

[Install]
WantedBy=multi-user.target
ファイルの作成が終わったら「systemctl」コマンドで「systemd」に登録していきます。
# systemctl enable mattermost
登録が終わったら「systemctl」コマンドで「Mattermost」が起動できるかの確認を行ってみてください。
# systemctl start mattermost
# systemctl status mattermost
● mattermost.service - Mattermost
   Loaded: loaded (/etc/systemd/system/mattermost.service; enabled; vendor preset: disabled)
   Active: active (running) since 月 2019-12-16 16:39:45 JST; 46s ago
 Main PID: 11960 (mattermost)
   CGroup: /system.slice/mattermost.service
           ├─11960 /opt/mattermost/bin/mattermost
           └─11979 plugins/com.mattermost.nps/server/dist/plugin-linux-amd64

##### 以下略 #####
無事「Mattermost」が起動することが確認できましたら、サーバの再起動を行って自動起動してくるかどうかの確認を行いましょう。
# reboot
問題なく起動できていたら作業は完了となります。
コメント